As part of this tutorial, you'll create a sample application. You can call it whatever you like but for the purposes of this tutorial, we will call it pictograph.
To create your app, you only need to run one command:
% lein new caribou pictograph
This will create your application, with a working configuration right out of the box, including its own database (which you can change at any time).
The project structure initially looks like this:
> tree pictograph
pictograph
├── api
│   ├── README.md
│   ├── project.clj
│   └── resources
│       └── public
│           └── cors
│               └── index.html
├── app
│   └── assets
├── caribou.keystore
├── project.clj
├── resources
│   ├── config
│   │   ├── boot.clj
│   │   ├── development.clj
│   │   ├── production.clj
│   │   ├── staging.clj
│   │   └── test.clj
│   └── migrations
├── site
│   ├── README.md
│   ├── project.clj
│   ├── resources
│   │   ├── public
│   │   │   └── ... twitter bootstrap files ...
│   │   └── templates
│   │       └── home.html
│   └── src
│       └── pictograph
│           ├── controllers
│           │   └── home.clj
│           └── core.clj
├── src
│   └── pictograph
│       ├── hooks
│       │   └── model.clj
│       └── migrations
│           ├── default.clj
│           └── order.clj
└── target
    ├── classes
    └── stale
        └── dependencies

26 directories, 40 files
Now that your application exists, you can start it:
% cd pictograph
% lein caribou migrate resources/config/development.clj
% lein ring server
Your Caribou application is now running on port 33333.
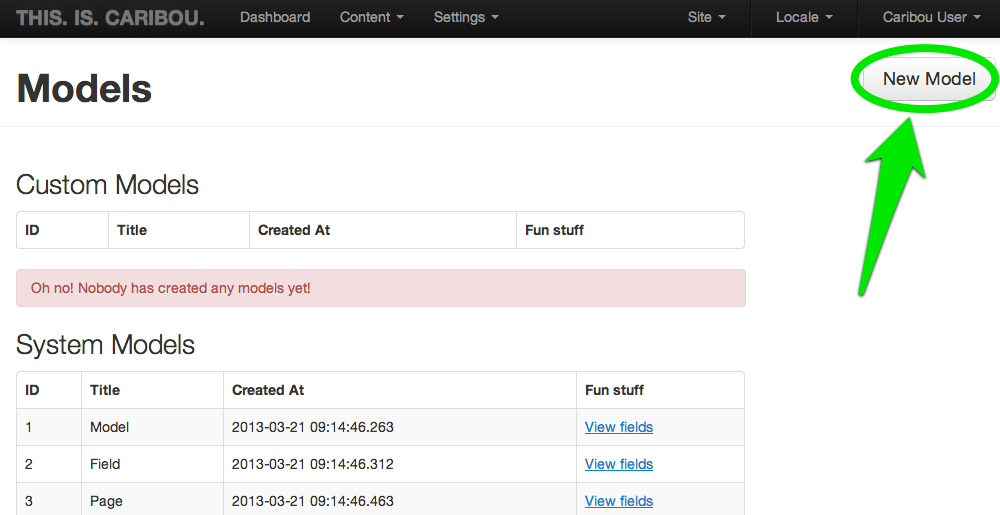
Point your browser at [http://localhost:33333] and follow the link to the admin interface. Log in with username caribou and password caribou. You'll be presented with a list of models:

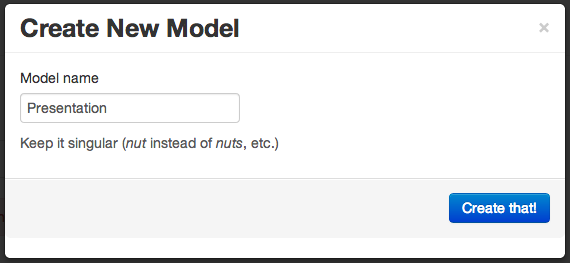
Click the "New Model" button to start creating your own custom content. We'll start by creating a model called Presentation.
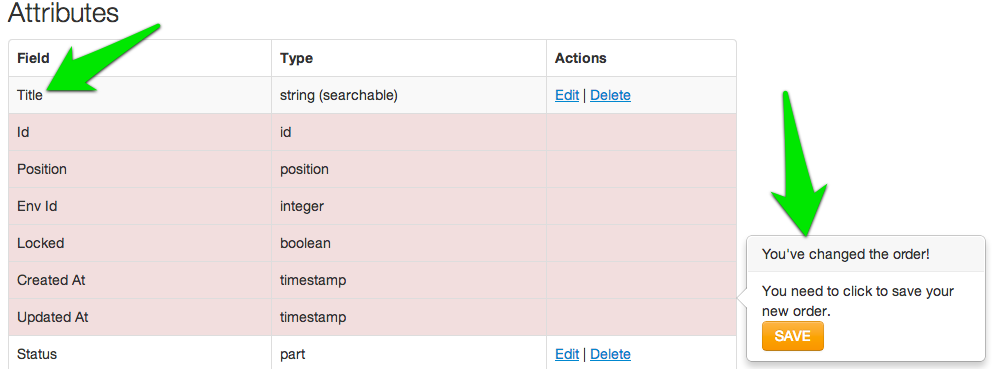
After you've created your model, you'll be shown a page of all of the fields in your new model. Initially, the fields will only be the default set of fields that Caribou uses to maintain your model, but you can add new fields.

You will start by adding three new fields:
After you've added these three fields, drag the "Title" field to thetop and click "Save" to update the order that the fields appear in your model.
Next you'll create a second model, and then we'll connect them.
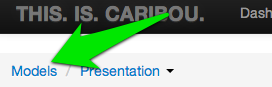
Return to the Models page by clicking the Models link in the breadcrumbs.
Just like you did with Presentation, create a new model called Slide, and add three fields (these are slightly different):
and once again, drag the title to the top and click "Save".
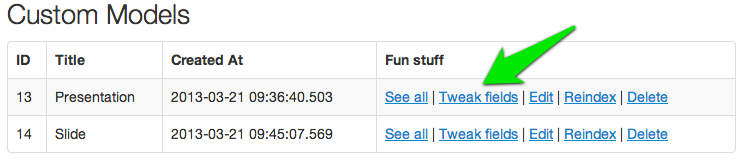
Go back to the Models page, and click "Tweak fields" for the Presentation Model. You're going to add another fields that will represent a collection of slides that belong to a presentation. Click "+ attribute" to add another attribute, but this time set the type "Collection of other model things". Enter Slides for the name, uncheck the "searchable" checkbox, and choose Slide as the Target.

Your presentations all now have a collection of slides, and each slide has an associated presentation!
From the Presentation dropdown at the top, choose "Create New" to make a new presentation, then click "Save then continue editing".

Once you've saved it, you can now add slides to the slides collection.

so click on Edit and you'll move to a screen to add a slide:
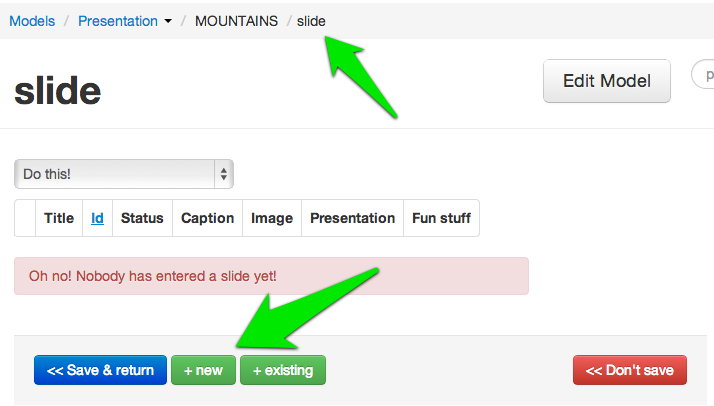
As you can see, there are no Slides associated with this Presentation yet, so you can click "+ new" to create a new Slide within this Presentation:
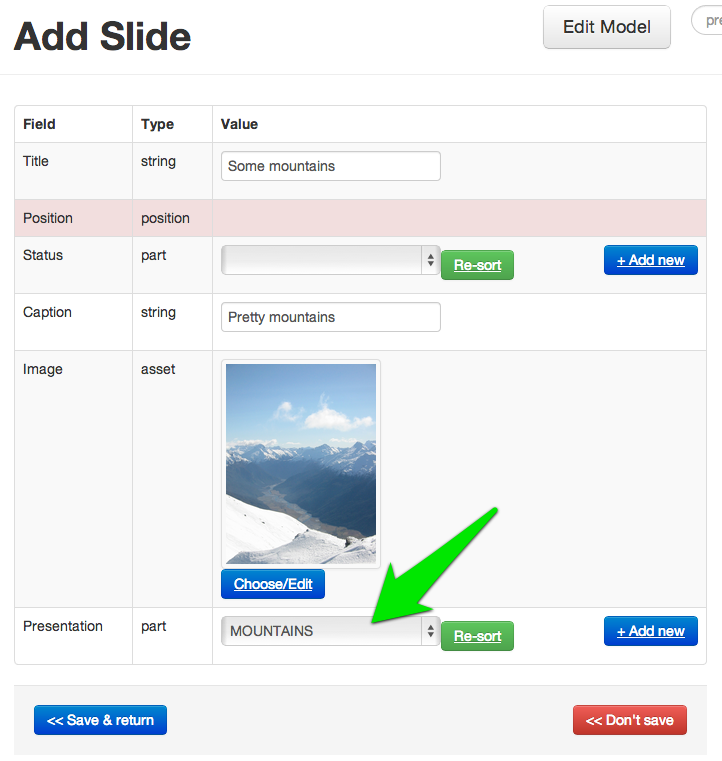
Be sure to upload an image too by clicking on "Choose/Edit" and selecting an image.
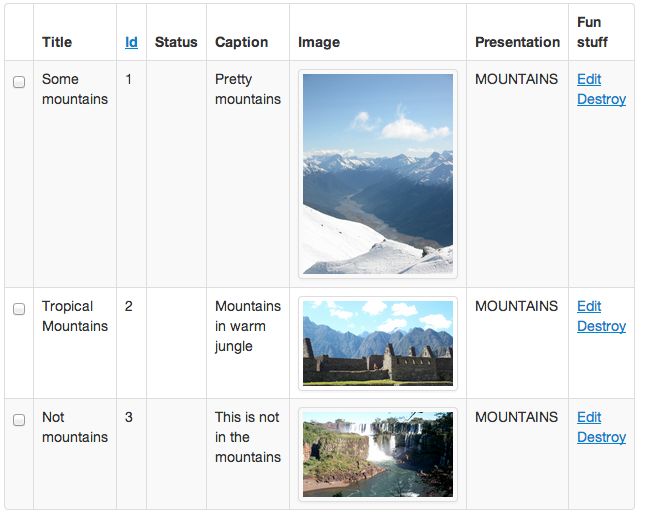
Go ahead and create a couple more slides, so you end up with something like this:
(Note: at present you need to create pages through the generic admin UI. This will change soon when we provide a Page-editor)
Now we're going to create user-facing pages to show our presentations.
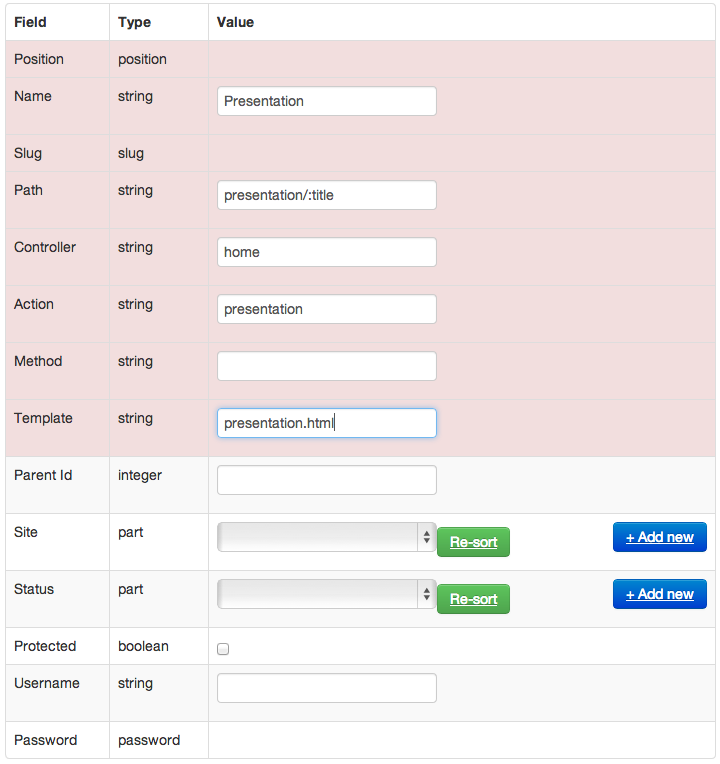
Go to the models page, and scroll to System Models at the bottom. Choose "View fields" from Page, then "Create a Page". Fill in the fields like this to create a page that will show a Presentation:
and then create a page to display a slide, again, paying attention to the fields:
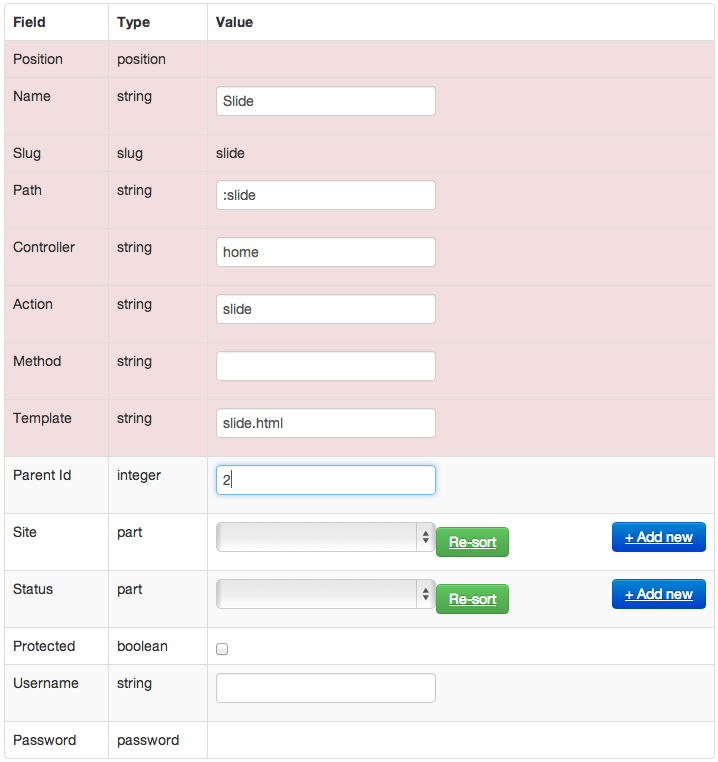
(Note: We set the parent id of the Slide page to the ID of the newly-created Presentations page - this step will happen automatically in the future).
Navigate to your new Presentation page, at [http://localhost:33333/presentation/Mountains]
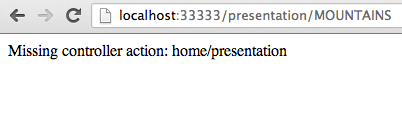
Oh no! Your controller action doesn't exist yet. We need to build it! Open the file site/src/pictograph/controllers/home.clj and add the following code:
(defn presentation
  [request]
  (let [title (-> request :params :title)
        presentation (model/pick
                      :presentation
                      {:where {:title title}
                       :include {:slides {}}})]
    (controller/render (assoc request
                              :presentation presentation))))
This is what a simple action looks like. It grabs the title of presentation from the URL, and then retrieves that presentation. Finally, it renders the page, adding in the newly-fetched presentation, making it available to the template(s).
Now, if you refresh your browser, you'll see this:
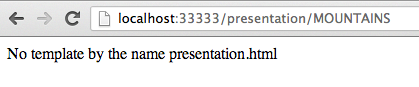
Oh no! Now there's no template. But the application is telling you what's missing, so you know exactly what to do. Let's create a new template for the page in site/resources/templates/presentation.html.
<h1>{{presentation.title}}</h1>
{{#presentation.slides}}
<a href="{{route-for :slide {:title presentation.title :slide title} }}"><img src="{{resize image {:height 200} }}" /></a>
{{/presentation.slides}}
Refresh your browser, and presto! Here are your presentation's slides.

Each slide is clickable (thanks to the route-for in the above HTML snippet) and the images are conveniently resized (and cached!) thanks to the resize. More on those later.
If you click one of the images, you'll see something familiar:

and you know that this means you need to write the action for this page:
(defn slide
  [request]
  (let [slide-title (-> request :params :slide)
        slide     (model/pick
                   :slide
                   {:where {:title slide-title}
                    :include {:presentation {}}})
        following (model/following
                   :slide slide
                   :presentation_position
                   {:where (select-keys slide [:presentation_id])})
        previous  (model/previous
                   :slide slide
                   :presentation_position
                   {:where (select-keys slide [:presentation_id])})]
    (controller/render (assoc request
                              :slide slide
                              :following following
                              :previous previous))))
This action looks a bit more complicated but really it's not. It fetches the slide that's mentioned in the URL, then fetches the following and previous slides in the presentation. Then it makes all three available to the template.
You'll also need to create the template in site/resources/templates/slide.html:
<h1>{{slide.title}}</h1>
<img src="{{resize slide.image {:height 500} }}" />
<h2>{{slide.caption}}</h2>
{{#previous}}<p><<< <a href="{{route-for :slide {:title slide.presentation.title :slide previous.title} }}">{{previous.title}}</a></p>{{/previous}}
{{#following}}<p><a href="{{route-for :slide {:title slide.presentation.title :slide following.title} }}">{{following.title}}</a> >>></p>{{/following}}
and now here's your slide page:

and you can click the links at the bottom to go to the next and previous slides.
Go into the admin, and edit your presentation under "Presentations" -> "See all" -> "edit". Click "Edit" in the Slides field, taking you to a view of the slides association with your Presentation. Drag them into a different order, and click Save.

Now refresh your "Presentation" page, and the order of the slides will have changed!
